At Jibble, we moved to a multi module architecture. Alongside with that, we have Kotlin Multiplatform that powers our core business logic and gives us a shared code between Android and iOS. It’s a monorepo project and we only use Kotlin Native for pure business logic code. Everything else related with iOS and Android is being handled on native side. The project is mainly a MVVM architecture. But we have extra couple of layers. Main components are:
- View → Activity or Fragment
- ViewModel → Communicator between Interactor and the View
- Interactor → Kotlin Native shared logic.
- Assembler → Assembles View, ViewModel, Interactor and Route.
- Route → Not the Router ❌
This can be another post topic but in short, the main benefit of this architecture for us is to avoid logical differences between platforms and reduce the amount of time to write Unit Tests for each platform. Cause we write tests for our core business logic only once, which are Interactors.
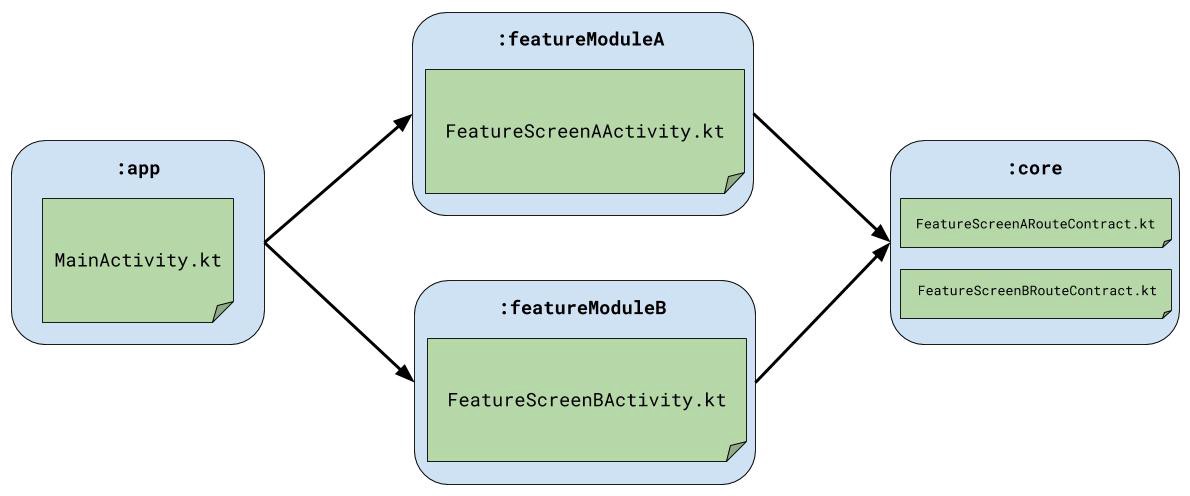
I will show a small example of how we use navigation in our multi module application. This example will be a shortened version of our actual navigation architecture without showing all the details about Assembler and Interactor. But rather it will focus on navigating from a Main App Module to Feature A Module and then navigation from Feature A Module to another Feature B Module.

You might ask, what’s the issue in here? Well, app module depends on featureModuleA and featureModuleB. Thus, it can easily start FeatureScreenAActivity and FeatureScreenBActivity. But what if we need to start FeatureScreenBActivity from FeatureScreenAActivity and vice versa. They don’t know about each other. And if we give dependency to each other, then we create a circular dependency graph which won’t work.
One way to achieve calling non-dependent activities is via defining the class package name on Intent creation.
val intent = Intent()
intent.setClassName(this,“com.uludagcan.navigation.SampleActivity”)
startActivity(intent)
Actually you can find a good article about this approach on this link from Gaël Marhic
https://proandroiddev.com/easy-navigation-in-a-multi-module-android-project-2374ecbaa0ae
But our solution to this problem will be a bit different. 🤔
Core Module and Route Contracts
Let’s introduce a core module to the project. That module will be the lowest level module in our module dependency graph. All modules will be dependent on it either directly or by depending on other module. Specifically, feature modules will have api dependency to core module. And main app module will have implementation dependency to feature modules. By doing that, app module will also be dependent to core module.

// Inside :featureModuleA module build.gradle file
dependencies {
    api project(':core')
}
// Inside :app module build.gradle file
dependencies {
    implementation project(':featureModuleA')
    implementation project(':featureModuleB')
}
Next thing is to create Route contracts for each screen to navigate. Inside core module, we create Route interfaces for each screen.
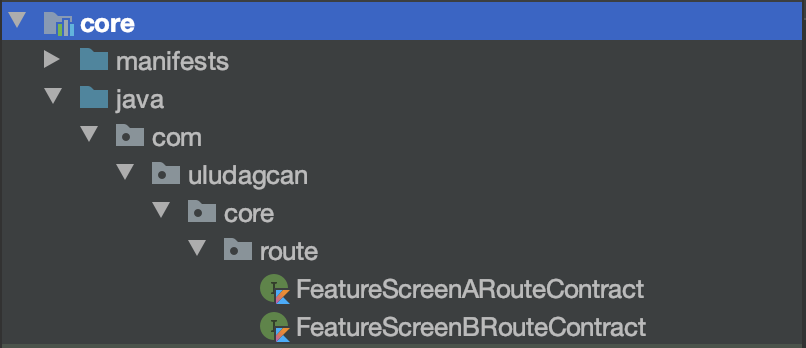
Here is how each of these contracts designed.
interface FeatureScreenARouteContract {
    fun setup(dataToPass: String)
    fun present(fromActivity: Activity)
}interface FeatureScreenBRouteContract {
    fun setup(dataToPass: String)
    fun present(fromActivity: Activity)
}
There are two functions. setup() is for passing data to that screen. And present() is to navigate to that screen. Each Route contract is a blueprint about how to navigate to itself. Not to other screen. This is why I said it’s not a Router.
Where do we put the concrete implementation of these routes?
👉 In each feature module’s screen package.


Let’s look at how each of these Routes are implemented.
class FeatureScreenARoute: FeatureScreenARouteContract {

    private var data: String? = null

    override fun setup(dataToPass: String) {
        data = dataToPass
    }

    override fun present(fromActivity: Activity) {
        val intent = Intent(fromActivity, FeatureScreenAActivity::class.java)
        val bundle = Bundle()
        bundle.putString("data", data)
        intent.putExtras(bundle)
        fromActivity.startActivity(intent)
    }
}
As I mentioned before, this is not Router. For example the above class is the definition of how to navigate to FeatureScreenAActivity. It defines which data will be passed to that screen and what is the present logic.
class FeatureScreenBRoute: FeatureScreenBRouteContract {

    private var data: String? = null

    override fun setup(dataToPass: String) {
        data = dataToPass
    }

    override fun present(fromActivity: Activity) {
        val intent = Intent(fromActivity, FeatureScreenBActivity::class.java)
        val bundle = Bundle()
        bundle.putString("data", data)
        intent.putExtras(bundle)
        fromActivity.startActivity(intent)
    }
}
We also removed the bundle data passing mechanism with the help of Assembler classes but that’s another topic to discuss.
Help of Dependency Injection
Another important component for this system to work is Dependency Injection. It could be Dagger2 or Koin. For the simplicity, we picked Koin for our architecture. (Also we had some issues with Annotation processor of Dagger and Kotlin Multiplatform) We need to define our contract classes in DI. To do that, we have a RouteModule file.
val routeModule = module {
    factory<FeatureScreenARouteContract> { FeatureScreenARoute() }
    factory<FeatureScreenBRouteContract> { FeatureScreenBRoute() }
}
We will put this DI package into app module.

We are ready to call screens from Activities. 🚀
How do we call FeatureScreenAActivity from MainActivity?
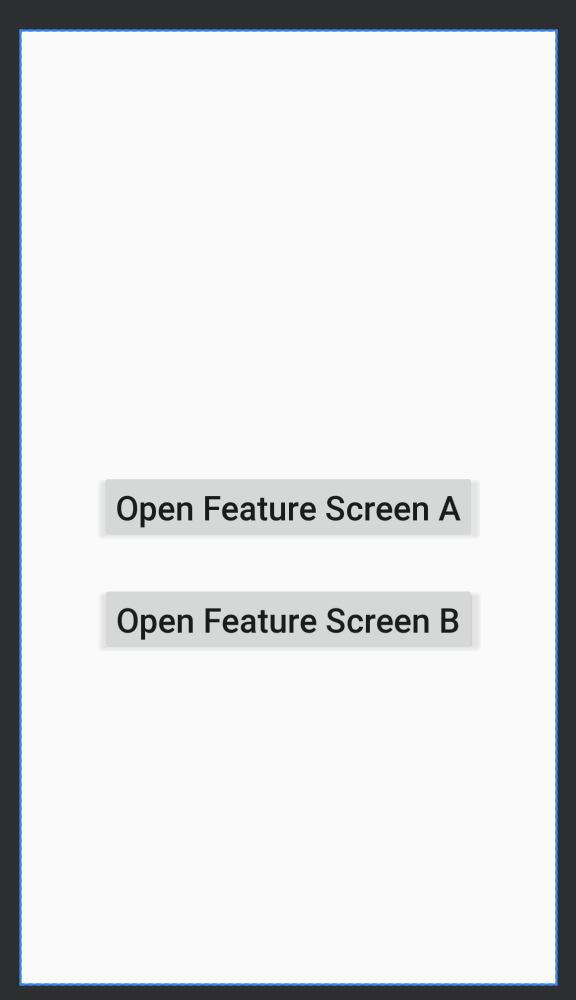
First of all, let’s imagine our app layout like below. Two buttons to navigate each screen. And on Screen A, we have another button to navigate us to Screen B.

Here is how we call Screen A from MainActivity. With the help of ViewModel and LiveData.

We send button clicks to ViewModel class. And here is what happen in ViewModel.
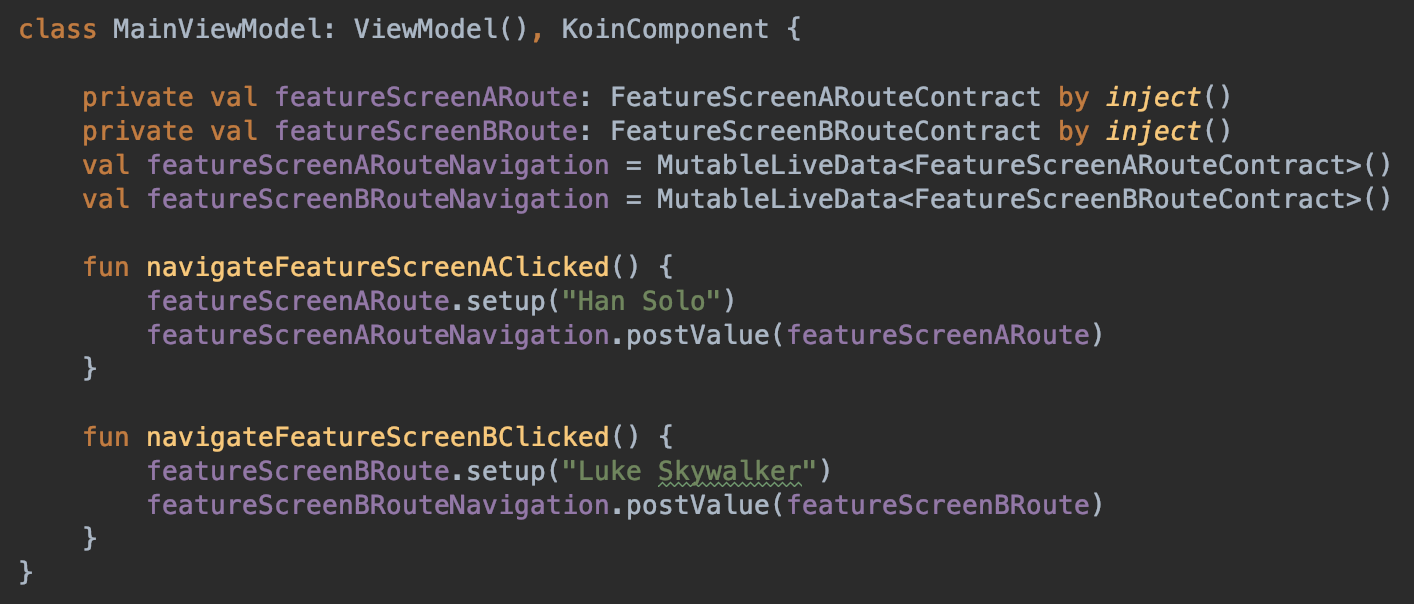
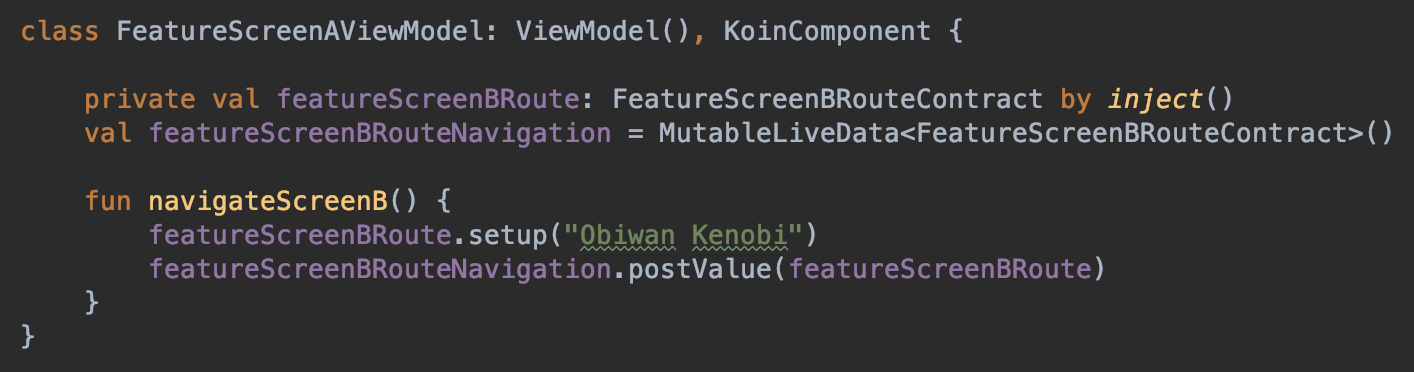
We inject our Routes to ViewModel class. From this ViewModel, we can navigate to both A and B screens. And when button clicked, we are also setting up the data we want to pass to each screen. After making route ready, we are ready to pass it to LiveData. That LiveData is being observed by the Activity.
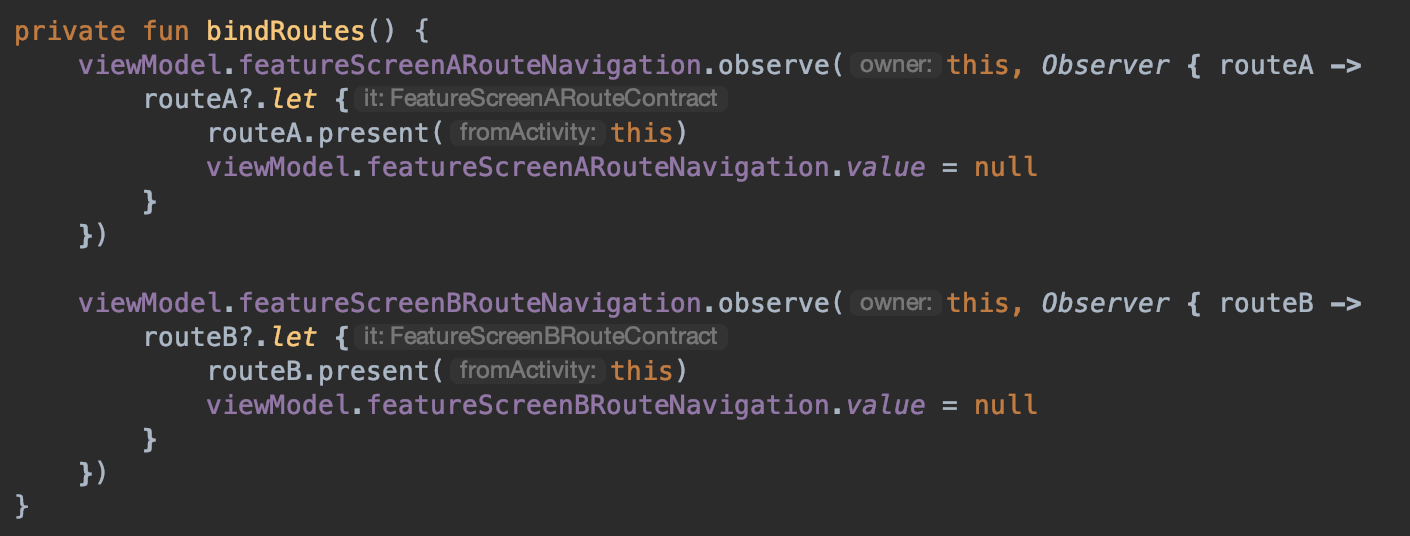
When Route object observed, present() function will be called by passing the Activity instance as this . And Screen A will appear.
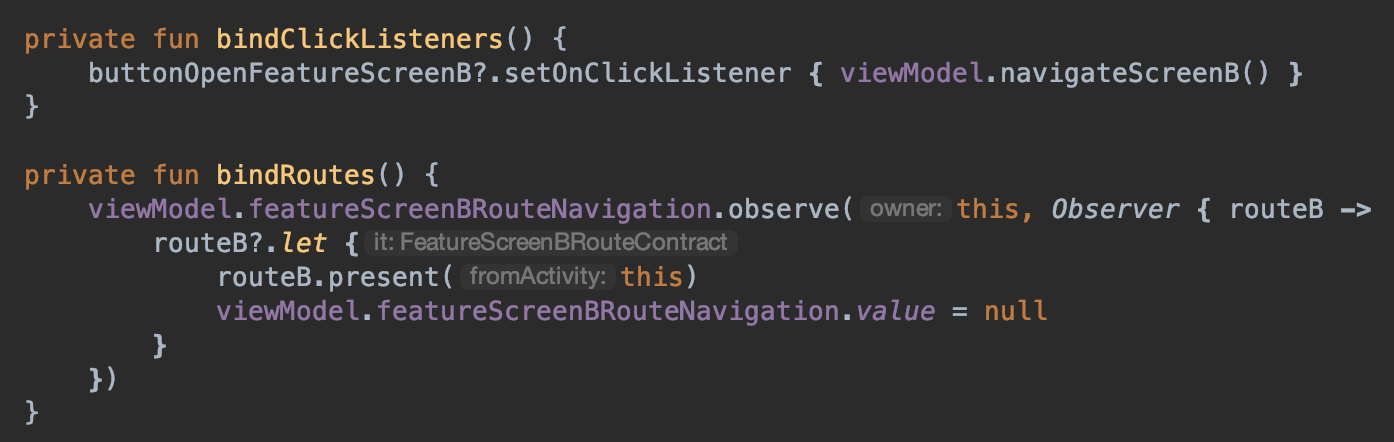
How do we call FeatureScreenBActivity from FeatureScreenAActivity?
It’s actually simple and the method is same. Here is the Activity and ViewModel classes.
Well, that’s all. ScreenA and ScreenB are on the different modules. But you can easily access to each other. Here is how it works:
You can access the full sample code from the link below.
Originally posted on https://medium.com/@uludagcan/another-navigation-in-multi-module-architecture-1d4945c1fed0
Thanks for reading ❤️

Leave a comment